· Kitchen · 16 min read
Restaurant Kitchen Layout: A Complete Guide to Getting It Right
Your kitchen layout determines workflow efficiency, food safety compliance, and how fast every plate reaches the pass. This guide covers zone planning, layout types, space allocation, equipment placement, ventilation, flooring, lighting, and the costly mistakes to avoid.
Your kitchen layout is not a floor plan you draw once and forget. It is the operating system of your restaurant. Every decision you make about where equipment sits, how zones connect, and which direction food flows will shape ticket times, labor costs, food safety, and staff retention for years.
Get it right, and your team moves through service like a machine. Get it wrong, and no amount of talent, training, or overtime will compensate for the friction built into the walls.
Why Layout Matters More Than You Think
According to The Kitchen Spot, commercial kitchens consume five to seven times more energy per square foot than other commercial spaces. Restaurants allocate 3 to 10 percent of operating expenses to energy alone. Poor equipment placement — a reach-in cooler parked next to a fryer, an oversized hood running at full blast — compounds those costs every single day.
But energy is only part of the picture. According to the Canadian Restaurant Supply industry analysis, design mistakes discovered after construction are among the most expensive problems a restaurant faces. Moving a drain, rerouting a gas line, or adding ventilation capacity after the walls are up costs multiples of what it would have cost to plan it correctly.
The takeaway: invest the time and money in kitchen design before a single tile is laid.
The Seven Essential Kitchen Zones
Professional kitchens are organized into distinct functional zones. According to the Eleven36 design guide and the WebstaurantStore layout guide, a well-designed kitchen separates operations into seven areas, each with specific infrastructure needs.
1. Receiving and Delivery. This is where product enters your building. You need external access with adequate space for staging deliveries and checking orders against invoices. Position this zone adjacent to storage so staff are not hauling cases across active work areas.
2. Storage. Separate dry, refrigerated, and frozen storage. Walk-in coolers should be accessible from both the receiving area (for deliveries) and the prep stations (for daily pulls). According to Toast’s equipment guide, the FDA requires refrigerated food storage at 40 degrees F or below. Organize using first-in, first-out rotation, and store heavy items between knee and shoulder height to reduce lifting injuries.
3. Ingredient Prep. Choppers, slicers, cutting stations, and prep tables live here. This zone needs proximity to both storage and the cooking line, but — and this is critical — the prep zone must be physically separated from the cooking line. According to WISK, raw proteins, produce rinsing, and allergen handling must not share traffic with hot pans and plating. This separation is both a food safety requirement and a workflow improvement.
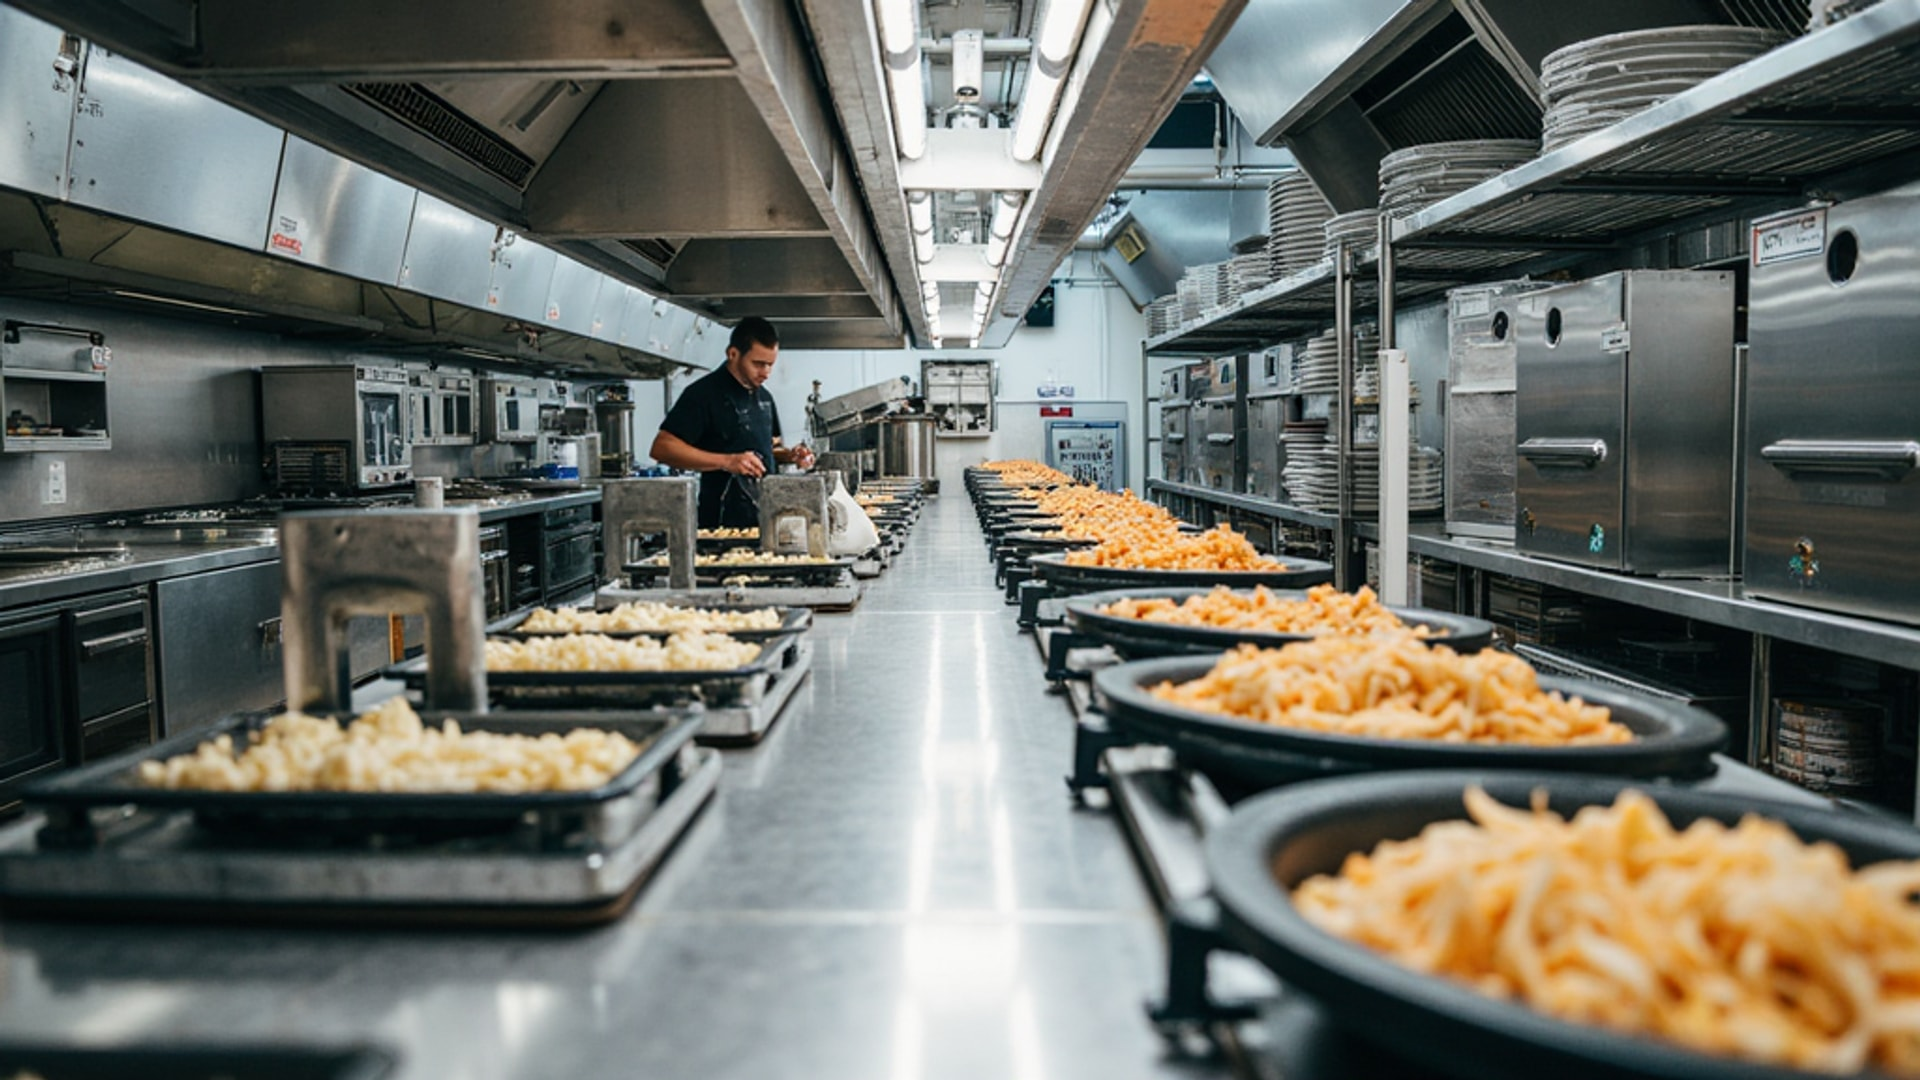
4. Cooking. The heart of the line: ranges, ovens, fryers, grills, and salamanders. Group heat-generating equipment together under a shared exhaust hood to concentrate ventilation needs and reduce costs. Position this zone for direct access to the pass.
5. Plating and Service (The Pass). Where dishes are assembled, inspected by the expeditor, and held at proper temperature before pickup. Needs heat lamps, strong lighting, and enough staging space for multiple tables during peak service.
6. Dirty Dish Collection. Servers drop dishes here without entering the cooking area. This zone must be isolated from food preparation to prevent contamination.
7. Warewashing and Sanitation. Dishwasher, three-compartment sink, drying racks, and chemical storage. According to the Canadian Restaurant Supply analysis, one of the biggest design mistakes is sizing this area for average volume instead of peak volume. Design your wash area for Saturday night at full capacity, not a Tuesday lunch.
→ Read more: Kitchen Cleaning and Sanitation: Schedules, SSOPs, and Health Code Compliance
The One Rule That Overrides Everything
Food moves in a single direction through these zones: from receiving to storage, through prep, into cooking, onto the plate, and out to service. Dirty dishes return through a separate path to warewashing without crossing the food production flow.
According to ContekPro’s design principles guide, this unidirectional flow prevents cross-traffic, reduces contamination risks, and speeds up ticket times. If your layout forces food to double back or dirty dishes to travel through prep areas, you have a fundamental design problem that will cost you every service.
Choosing Your Layout Configuration
Your kitchen’s physical shape and your menu concept determine which configuration works best. According to the WebstaurantStore layout guide, there are four primary configurations, each with distinct trade-offs.
Assembly Line
Stations are arranged in a straight sequence. Ingredients enter one end, move through prep and cooking, and exit as finished plates. Each cook handles one step before passing the item forward.
Best for: Quick-service, limited-menu operations producing high volumes of similar items (burger joints, pizza shops, sandwich lines).
Trade-off: Lacks flexibility for complex, multi-course menus.
Island Layout
The cooking battery (ranges, ovens, fryers, grills) sits as a central module in the middle of the kitchen, with prep, storage, and plating stations along the perimeter walls. This creates circular traffic flow and gives the chef direct sightlines to all stations.
Best for: Full-service restaurants where the chef needs to oversee the entire line from one position.
Trade-off: Requires more square footage than other configurations.
Galley Layout
All stations and equipment line two parallel walls with a single working corridor between them. Everything is within arm’s reach, which minimizes wasted steps.
Best for: Narrow or small spaces where every square foot counts.
Trade-off: Limits the number of staff who can work simultaneously. Can create bottlenecks during peak service, according to the WebstaurantStore guide.
Zone Layout
The kitchen is divided into specialized stations (grill, saute, fry, garde manger, pastry) that operate semi-independently. An expeditor coordinates timing across zones for table-complete service.
Best for: Larger kitchens with diverse menus and multiple production types. Fine-dining operations with extensive from-scratch menus.
Trade-off: Needs a strong expeditor to keep timing tight across independent stations.
Which Layout Fits Your Concept?
The FSW YouTube walkthrough makes an important practical point: while building from scratch lets you customize every aspect around your specific menu and workflow, taking over an existing restaurant space is significantly cheaper because plumbing, electrical, and ventilation infrastructure is already in place. The middle path is to find a space that previously housed a similar type of restaurant and make targeted modifications.
Space Allocation: How Much Kitchen Do You Need?
Getting your kitchen size right is a balancing act. Too small, and you create dangerous bottlenecks. Too large, and every cook walks unnecessary steps hundreds of times per shift.
According to Toast’s floor plan guide, the standard allocation is approximately 5 square feet of kitchen space per dining seat. The average U.S. commercial kitchen is approximately 1,000 square feet, and a 60-seat restaurant needs a minimum of 300 square feet of kitchen space.
The broader space ratio breaks down like this:
| Restaurant Type | Kitchen | Dining | Support |
|---|---|---|---|
| Standard dine-in | 30% | 60% | 10% |
| Quick-service | 55% | 35% | 10% |
| Fine dining | Up to 40% | 50% | 10% |
Quick-service flips the ratio because speed of production is the primary differentiator, according to the Toast guide. With smaller seating areas designed for quick turnaround or takeout, the kitchen and storage receive the majority of the floor plan.
For buildout cost context, according to EB3 Construction data compiled in the restaurant buildout topic synthesis, kitchen and total construction costs range from $100 to $800 per square foot, with an industry median around $450 per square foot. Kitchen equipment alone runs $15,000 to $250,000 or more. Getting the layout right before construction begins is not just good practice — it is the single most effective way to protect that startup investment.
→ Read more: Common Commercial Kitchen Design Mistakes and How to Avoid Them
Dimensional Standards for Aisles and Clearances
The dimensions within your kitchen directly affect both safety and speed.
According to the Eleven36 design guide and Texas Department of Insurance ergonomics research, these are the clearance minimums to design around:
| Area | Minimum Clearance |
|---|---|
| Main traffic paths | 3 feet (36 inches) |
| Staff working back-to-back | 4 feet (48 inches) |
| Between parallel workstations (ergonomic standard) | 41-47 inches |
| ADA-compliant circulation paths | 36 inches minimum |
| ADA wheelchair turning space (shared areas) | 60 inches |
According to the Texas Department of Insurance’s ergonomics guidance, the 41-47 inch spacing between parallel workstations allows two people to pass without one having to stop working or move aside. These dimensions must accommodate peak-hour traffic, not average conditions.
Aisle width is a critical balance. Too narrow, and staff create gridlock during service. Too wide, and you add unnecessary steps to every task performed hundreds of times per shift.
Equipment Placement Strategy
Where you place equipment determines how efficiently your team moves. According to the TouchBistro practitioner guide, top chefs treat equipment placement as a strategic decision, not an afterthought.
Practical Placement Rules
- Group heat-generating equipment under a single hood system. This concentrates ventilation needs and cuts exhaust hood costs.
- Keep refrigeration away from heat sources. A reach-in cooler next to a fryer works dramatically harder to maintain temperature, increasing energy costs.
- Position pots and pans near the dishwasher to minimize transport time.
- Keep salad and cold stations away from heat sources to preserve ingredient quality.
- Mount equipment on casters for thorough cleaning underneath and behind units, as recommended by the Eleven36 design guide.
- Use stainless steel or NSF-certified non-porous materials for all food contact surfaces.
- Maximize vertical space with wall-mounted shelves, magnetic knife strips, and hanging pot racks. According to Hitchcock Farms, many kitchens have unused wall space above counters that can hold frequently-used items off the prep surface while keeping them within reach.
The Station Self-Sufficiency Principle
According to the WISK workflow guide, each station should have its own set of tools, cutting boards, reach-in cooler or lowboy refrigerator, and waste receptacles. The goal: everything a cook needs for their assigned tasks should be within two steps. When a cook walks across the kitchen to retrieve a tool or ingredient, those seconds accumulate across hundreds of orders into hours of lost productivity.
Energy-Smart Placement
According to The Kitchen Spot’s energy efficiency guide, ENERGY STAR certified commercial dishmachines run 40 percent more efficiently than standard models, saving approximately $1,500 per year with lifetime savings reaching $19,000 per unit. Gas fryers operate 30 percent more efficiently, saving $410 per year. Steam cookers achieve 60 percent greater efficiency at $1,000 in annual savings. A restaurant using one ENERGY STAR unit from each major equipment category can expect combined savings of approximately $4,300 annually.
These numbers make the case for factoring energy efficiency into your equipment selection and placement from the start, not as an afterthought.
Ventilation: The System You Cannot Afford to Get Wrong
Kitchen ventilation removes heat, smoke, grease-laden vapors, and steam while supplying fresh make-up air. It is one of the most regulated and most expensive aspects of commercial kitchen design.
Two Hood Types
According to the WebstaurantStore ventilation code guide:
- Type I (grease hoods): Required above equipment producing grease-laden vapors — fryers, grills, charbroilers, ranges, ovens, and woks. These hoods require a UL 300-compliant wet chemical fire suppression system integrated into the hood.
- Type II (condensate hoods): For equipment producing only steam, vapor, and heat — dishwashers, steam tables, pasta cookers. No fire suppression required.
Sizing and Clearance Requirements
Hoods must overhang cooking surfaces by at least 6 inches on all open sides. The vertical distance between hood and cooking surface cannot exceed 4 feet. Type I hood ducts must be made from steel meeting minimum thickness specifications per the International Mechanical Code.
Make-Up Air: The Invisible Problem
Make-up air units replace the air that exhaust hoods remove. Without them, according to the HVAC and plumbing infrastructure topic synthesis, the kitchen operates under negative pressure: doors slam, hoods lose efficiency, drafts pull conditioned air from the dining room, and gas equipment can back-vent combustion gases — a genuine safety hazard.
Demand-Controlled Ventilation
According to The Kitchen Spot, traditional exhaust systems run at full speed regardless of cooking activity. Demand-controlled systems that adjust fan speed based on actual cooking load can reduce ventilation energy costs by 30 to 50 percent during low-activity periods while maintaining fire safety compliance at peak. Given that ventilation is a major energy cost driver, this technology pays for itself quickly.
Maintenance
According to the WebstaurantStore code guide, maintenance frequency is dictated by fire code. High-volume operations (24-hour restaurants, heavy charbroiling) may require monthly hood and ductwork cleaning. Moderate-volume restaurants typically follow a quarterly schedule.
Flooring That Survives a Decade of Service
Your floor takes more abuse than any other surface in the kitchen. It must handle constant moisture, dropped heavy objects, hot grease spills, and rolling equipment — while keeping your staff safe on their feet for 8 to 12 hour shifts.
According to the WebstaurantStore flooring comparison guide, your main options are:
| Material | Best For | Key Advantage | Key Limitation |
|---|---|---|---|
| Quarry tile | High-traffic kitchens, pizzerias | Slip-resistant, handles thermal shock | Grout lines need sealing |
| Sheet vinyl | Fast-food, bakeries, cafeterias | Seamless surface, cost-effective | Less durable under heavy equipment |
| Concrete (sealed) | Large, high-volume kitchens | Exceptional durability, seamless | Hard on feet; requires anti-fatigue mats |
| Epoxy | Industrial kitchens, breweries | Chemical-resistant, seamless finish | Slippery when wet without non-slip coating |
| Rubber | Equipment-heavy kitchens | Cushioned, reduces fatigue and noise | Degrades where oils and fats spill |
Regardless of material, slope floors toward drains so spills evacuate quickly. According to OSHA requirements summarized by the WebstaurantStore, employers must maintain floors in a clean and dry condition as reasonably possible. Anti-fatigue mats at each workstation are essential — the Texas Department of Insurance’s ergonomics guidance confirms that standing on hard surfaces for full shifts causes fatigue, back pain, and circulatory issues.
→ Read more: Commercial Kitchen Flooring: Materials, Safety, and Code Requirements
Lighting: A Food Safety Requirement, Not an Afterthought
Lighting in a commercial kitchen is not about ambiance. It is a code requirement with specific minimums.
According to the Cenza lighting standards guide, the FDA Food Code specifies:
| Zone | Minimum Illumination |
|---|---|
| Food prep areas (knife work, plating) | 50 foot-candles |
| Equipment and utensil cleaning areas | 20 foot-candles |
| Storage rooms | 10 foot-candles |
Fixtures should carry NSF International certification confirming smooth, sealed housings that prevent food contamination. An IP65 or higher rating ensures dust-tight, water-resistant protection against kitchen steam and cleaning sprays.
Surface-mounted or recessed fixtures are preferred over hanging fixtures, which accumulate dust, grease, and debris. Where hanging fixtures are necessary in open kitchens visible to guests, clean them frequently.
One often-overlooked detail: excessive glare from stainless steel surfaces, wet floors, and shiny countertops causes eye fatigue and creates safety hazards. Use indirect lighting, diffused fixtures, and careful placement angles to minimize reflection.
Fire Suppression: Non-Negotiable
Fire suppression is governed by NFPA 96 and is mandatory in every commercial kitchen. According to the Jay L. Harman Fire Equipment guide, most states have adopted NFPA 96 alongside NFPA 17A as part of their fire codes, and insurance companies require compliance as a prerequisite for coverage.
Key requirements:
- Automated suppression must protect all grease removal devices, hood exhaust plenums, exhaust duct systems, and cooking equipment producing grease-laden vapors
- Wet chemical systems complying with ANSI/UL 300 standards are the most effective and most commonly used technology
- At least one Class K fire extinguisher must be readily accessible to all kitchen staff
- Installation and maintenance require certified technicians trained by the system manufacturer
- Documentation of all inspections and maintenance must be maintained for regulatory review
Build fire suppression into your layout from the first sketch. Retrofitting is expensive and disruptive.
→ Read more: Kitchen Fire Suppression Systems: Requirements, Costs, and Compliance
Ergonomics: Design for Human Bodies
Your kitchen staff work on their feet for 8 to 12 hours in a fast-paced, confined environment. If the layout does not account for human ergonomics, you will see it in injury rates, workers’ compensation claims, and turnover.
According to the Texas Department of Insurance:
- Work surface height should be 28 to 35 inches — a few inches below the cook’s elbow. Too high causes shoulder strain; too low causes back strain from hunching.
- Anti-fatigue mats at every workstation reduce strain from prolonged standing. Mats should be beveled at edges to prevent tripping and made from grease-resistant materials.
- Repetitive motion injuries are prevented by rotating tasks, using ergonomic tools with cushioned grips, and maintaining sharp knives (dull knives require more force and increase strain).
- Heavy items should be stored between knee and shoulder height to minimize lifting injuries. Two-person lifts for heavy items should be standard practice.
Accessibility: Build It In From Day One
ADA compliance is not optional, and retrofitting is far more expensive than designing for accessibility from the start.
According to the Accessibly ADA compliance guide:
- Employee circulation paths must be at least 36 inches wide
- Equipment controls must be mounted between 15 and 48 inches from the floor
- Controls must be operable with one hand, without tight grasping, pinching, or twisting
- Maximum force to activate controls cannot exceed 5 pounds
- Kitchens over 1,000 square feet must provide an accessible path to shared spaces (break rooms, restrooms)
Wider aisles and varied counter heights do not just accommodate wheelchair users. They also benefit employees with temporary injuries, staff of varying heights, and anyone pushing a heavy cart through a tight space. Proactive accessible design is simply better design.
The Costly Mistakes to Avoid
The Canadian Restaurant Supply industry analysis and the kitchen layout topic synthesis identify these as the most consistently cited design failures:
Excluding the chef from the design process. Architects and designers do not understand menu execution, workflow, or what the back-of-house team needs during service. The chef must be involved from day one.
Designing wash stations for average volume. Size warewashing for your busiest night. The bottleneck at the dish pit on a packed Saturday directly affects how fast clean plates get back to the line.
Poor storage placement. Placing storage on the opposite side of the kitchen from the receiving door forces staff to haul heavy boxes across busy work zones, creating safety hazards and wasting labor.
Inadequate ventilation. According to the Canadian Restaurant Supply analysis, the push for lower CFM ratings to save costs often leaves chefs working in temperatures above 100 degrees F. That is a staff retention problem disguised as a cost savings.
Ignoring utility constraints. Gas lines, electrical circuits, water, and drainage dictate where equipment can go. Engage a kitchen design consultant early to avoid expensive rework.
Buying cheap equipment. The initial savings from cheaper equipment are quickly consumed by maintenance expenses, operational downtime, and lost productivity.
Skipping health authority consultation. According to the topic synthesis, local health department requirements vary significantly by jurisdiction. Code violations discovered after construction require expensive remediation. Consult your local health authority before finalizing any layout.
Kitchen Layout Checklist
Before you finalize your design, verify every item:
- Food flows in one direction from receiving to plate, with no cross-traffic
- Dirty dish return path does not cross food production areas
- Chef was involved in the design from the beginning
- Storage is adjacent to the receiving area
- Prep zone is physically separated from the cooking line
- Every station has its own tools, storage, and waste disposal within two steps
- Aisle widths meet minimums: 36 inches for paths, 41-47 inches between workstations
- Heat-generating equipment is grouped under a shared Type I exhaust hood
- Refrigeration is positioned away from heat sources
- Make-up air system balances with exhaust volume
- Fire suppression covers all grease-producing equipment, hoods, and ductwork
- Flooring is slip-resistant with slopes toward drains
- Lighting meets FDA Food Code minimums (50 foot-candles in prep areas)
- Anti-fatigue mats are placed at every workstation
- ADA circulation paths are at least 36 inches wide
- Warewashing zone is sized for peak volume
- Local health authority has reviewed and approved the plans
From Blueprint to Living Kitchen
A kitchen layout is not finished when construction ends. Walk new hires through the design during onboarding and explain the reasoning behind each zone and traffic path. According to the WISK workflow guide, when every staff member understands the logic, they reinforce it instead of undermining it.
Revisit your layout as your menu, volume, and staffing evolve. A design that works at 50 covers per night may bottleneck at 100. Equipment on casters, modular workstations, and flexible utility connections — the principle of flexibility emphasized by the Certified Food Service Professionals handbook cited in the WebstaurantStore guide — allow you to adapt without a full renovation.
The best kitchen layouts are living systems: designed with rigor, built with quality, and refined through daily observation. Get the fundamentals right, and your kitchen will reward you with speed, consistency, and a team that wants to show up tomorrow.